GROWN-UP GIRLS LIKE TO PLAY TOO! WELCOME TO MY PLAYGROUND

Tuesday, August 31, 2010

Sharpie Strikes Again

You've just gotta love those wonderful little permanent markers known as "Sharpies". The worlds most popular marker even has its own blog dedicated to
the creative use of Sharpie markers. Well, necessity being the mother of invention, I think I've discovered another one!

Before I tell you what, let me apologise in advance for the dark pictures...inspiration sometimes strikes at the wierdest times, like in the middle of the night when my lighting is at its worst. Now...with that out of the way...I'll show you my project.
If you're anything like me, you probably have some ugly metal picture frames lurking around your house. I've got a ton of them, and the other day when I was looking through my frame stash for a black 8 X 10 frame, there of course, was not a single one to be found. Then, I happened to look at my desk and spotted a Sharpie.....
Going on the assumption that the frame couldn't look much worse than it already did, I picked up the Sharpie and began to "paint" it with the marker.
It worked surprisingly well. In less than 15 minutes, I'd transformed the dated frame into a usable one. Of course, you could also do this with spray paint, but with a Sharpie, there's no drying time. And, of course, if you've missed a spot, touch-ups are a breeze!

Until next time,

Friday, August 27, 2010

We'll Always Have Paris

"We'll always have Paris". That's a favorite quote from a favorite movie, and also the inspiration for a decoupage project that I'd like to share with you today.
I picked this chair up at the local Goodwill for $3. It was partially painted purple and had a few loose joints but the lines were decent. At that price, I figured I could find something to do with it. And I decided on decoupage.
Aside from a few painted accents, the chair is completely covered in paper, mostly vintage. I used lots of old sheet music, some reproduced vintage French love letters and wall paper from the 1930's and 1940's as the foundation materials. Accents include a vintage heart shaped doily, a postcard from France, and some magazine cutouts.

One of the details that I most enjoyed doing was the back slats of the chair; each one tells a little Parisian story
This one shows a couple in parting surrounded by love letters, a photograph of the Eiffel Tower, and an old airplane.
The one beneath it highlights a dreamy looking starlet with more photos of the Eiffel Tower, another letter, and lots of roses.
This one depicts a young couple married in Paris, with a photo of the Cathedral of Notre Dame and of course, another Eiffel Tower shot.
This one features a photo of a lovely young woman gazing into the mirror, memories of Paris in her thoughts. Other images from this scene include a party photo, the Eiffel Tower, a love letter, and lots of roses.

This was a very time consuming, but fun project, and I'm quite pleased with how it turned out.
It has found a home at the desk where I work on paper projects. Between the chair and my mood board there's plenty of inspiration close at hand.


Until next time,

This post is shared on "Show and Tell Friday"
at Cindy's gorgeous blog, My Romantic Home. You should check it out....lots of great ideas to discover!

Tuesday, August 24, 2010

Bare Bulb Dilema

Maybe you're lucky enough to have avoided them...but then again...maybe not. Many homes, especially older ones have a bare bulb somewhere. Pehaps yours is lurking inside your closest; or maybe it's hiding out in the garage, basement or laundry room.
Or then again...maybe not...perhaps I got them all. I have seven such fixtures in my former pizza restaurant turned rental house!

I haven't quite figured out what the person who designed the lighting was trying to achieve. Maybe they just needed lights and were on a tight budget. Whatever the reason, every room, save the kitchen and bath is at least somewhat illuminated by these creatures!

My first impulse was to replace them all with chandeliers, but that idea hit a few roadblocks. The first one was the expense of purchasing seven chandeliers. The second is my phobia of working with electricity, and finally I have to keep in mind this IS a rental house! So what to do?

One day it occured to me to replace the lowly incandescent bulbs with chandelier lights. That helped a little, but not a lot.
Then I had another idea...what if I dressed them up with some crystals... The bare bulb fixtures at my house apparently had some type of globe at one time, and the screws which once kept it in place are still here. Using that as a starting point I dangled some pretty drops from the screws. That was better, but it was still missing something.
So I layered on lengths of rope crystals to give it a little more depth. I thought about painting the fixtures, since they are pretty chippy, but decided against it as I like the contrast of rustic with refined. While still not my choice of lighting fixtures, the crystals have made the bare bulbs quite a bit more bearable than they were in their original state.
For the five bulbs in the open living area I stayed with pretty much the same design, but by the time I got to the bedrooms, I ran out of crystal chain. Time to improvise again.
This time I used a combination of crystal beads and pearls that were salvaged from old necklaces.
Perhaps one day I'll overcome my fear of electrical wiring enough to try something different. Maybe I'll come across a gorgeous chandelier that I just can't resist, and replace the central fixture with that. But in the meantime, I've learned to make do and turn my lemons into lemonade so to speak. Most of my visitors compliment my creative fixtures, so maybe they're not so terrible after all.

If you have a bare bulb lurking somewhere, you might want to try a similar treatment. If you don't have the screws to drape the crystals from, try using small cup hooks screwed into the ceiling. This approach would give you even more options when designing your "bare bulb chandelier".

Until next time,

Friday, August 20, 2010

My Little Office

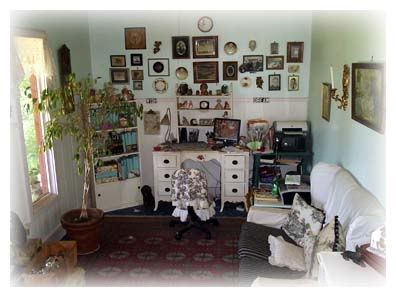
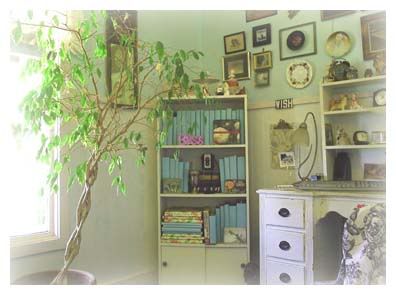
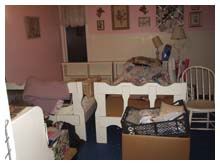
My office is one of my favorite rooms; good thing, too, since it seems to be the one in which I spend the most time...and aside from the computer, it was one of the least expensive rooms to decorate. I thought I'd share some of my thrifty finds and decor tips with you today.
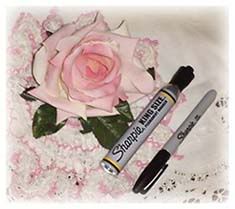
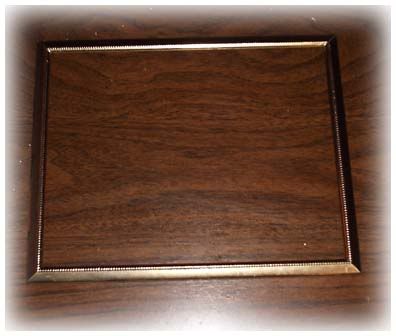
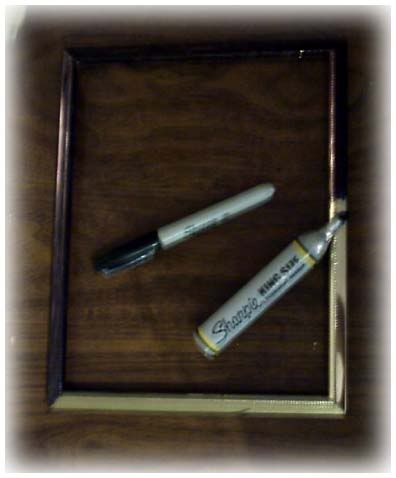
As you can see, the focal point of the room is a grouping of black and white family photos on the wall above my desk. Almost all of the frames were yard sale and thrift store finds, many of which, I've re-done. One of my favorite techniques for doing old frames in metallics is the use of floral spray paint. It has a sheer quality about it which adds color, but allows a little of the woodgrain to show beneath, much like a stain. I like to layer on various metallic paint colors until I reach an effect that I like.

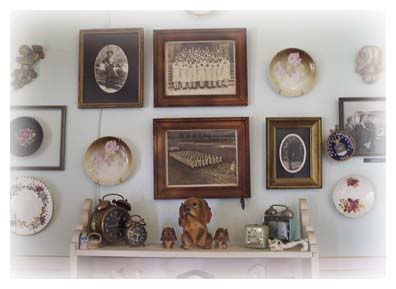
I also like to incorporate other types of objects such as plates, cherubs, vintage postcards, and memoribilia related to one of the pictures. For example, I hung my mother's dog tags from her time in the navy
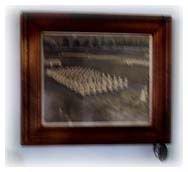
during WW2 over the edge of the frame holding her navy photo. In another instance I attached a patch that my father received when winning a volleyball championship to the photograph of him accepting the trophy.
My mother's dog tags adorn her Navy photo.
In order to achieve a pleasing effect when doing this type of arrangement, one must be careful to keep balance in mind. The arrangement need not be completely symmetrical, but objects of similar visual weight should
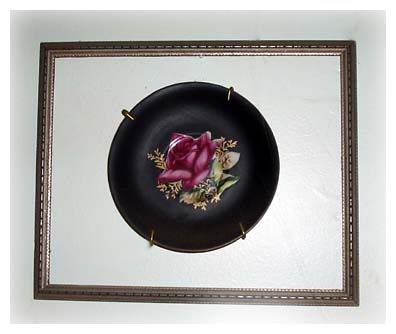
In order to balance an 8 X 10 photo on the other side of the display, I hung a similar size frame around this plate.
be used to balance one another. Another trick is to keep frames somewhat similar in tone, i.e., all gold, or all black; or if mats are used, stick to a single color. Also, I've found that an arrangement of photographs generally looks best with all black and white or all color images, but not a mix of both. If I had used color photos here, I would have kept the accent pieces to a single solid hue.

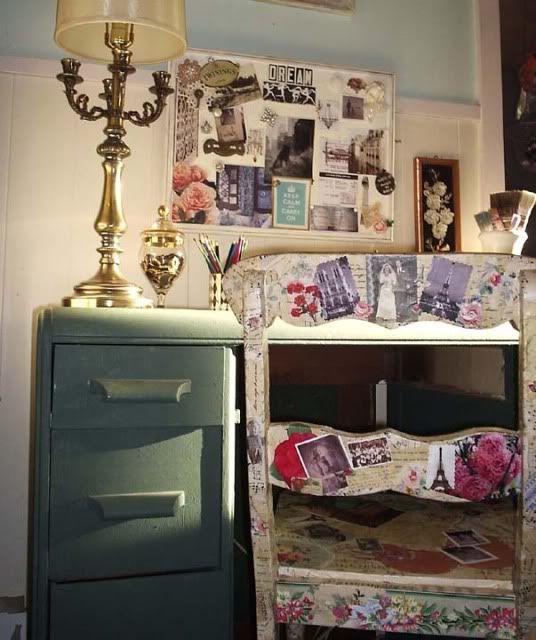
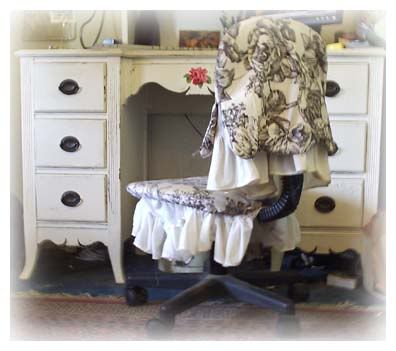
The desk is one of my favorite junk shop steals, at $15. Of course, when I found it, the veneer was peeling badly, so I just stripped it of the veneer, painted it white, and distressed it.
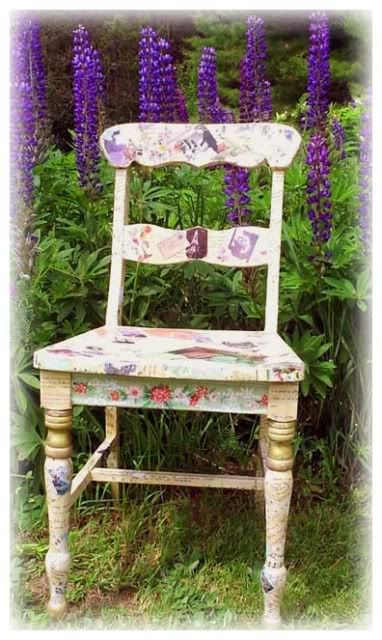
I also decoupaged a rose cut-out from vintage wallpaper as a cheerful accent. The hardware is original and by itself worth at least the price of the desk! The chair is a standard issue cheapie office number, which I slipcovered to dress it up a bit.
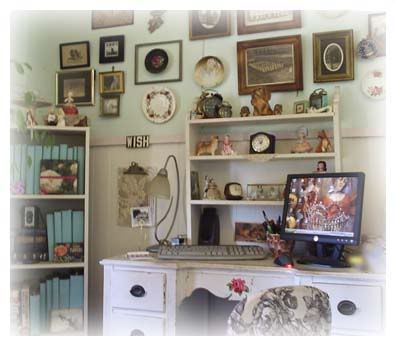
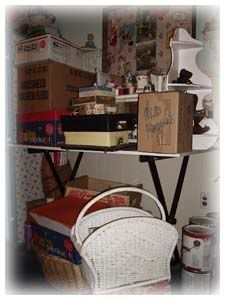
The hutch above the desk was another junk store bargain at $5. It is in actuality a shelf that I painted white, but it serves the purpose just fine and keeps some of my favorite collectibles in easy view.
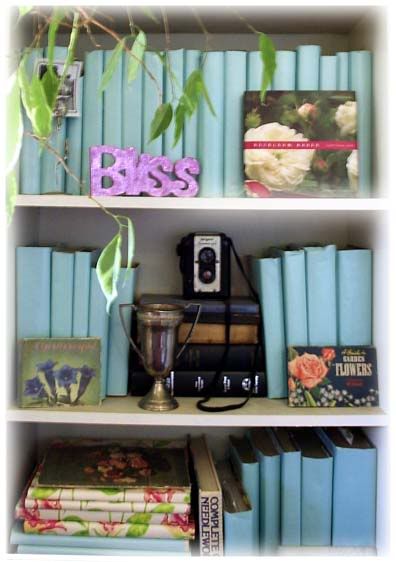
The bookcase was an ugly wood-tone laminate piece that I nabbed at a yardsale for next to nothing. A good coat of primer plus some white paint and vintage knobs completed its makeover.
As you can see, I've made jackets for most of my books using wrapping paper that coordinates with the room. Another trick that I like to use for making a bookcase display more interesting is to keep some books upright and others lying flat. The horizontal books make a nice pedestal for display; in this case, for the first camera that I had a child. I've also accessorized the shelves with an old silver trophy and some small vintage garden books.
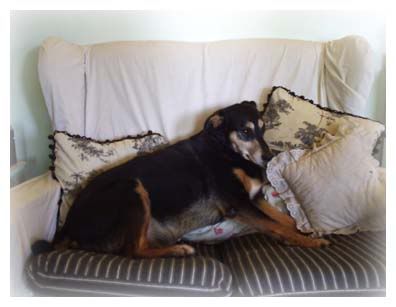
My loveseat was picked up curbside for free! This time a few white sheets came to the rescue in the form of a slipcover. I've made a number of cushion and pillow covers of various materials and change them out to suit my mood. By the way, whether you need to hide ugly upholstery or not, if you have pets, slipcovers are the way to go. Just pop them in the wash and never worry about your furniture being soiled.
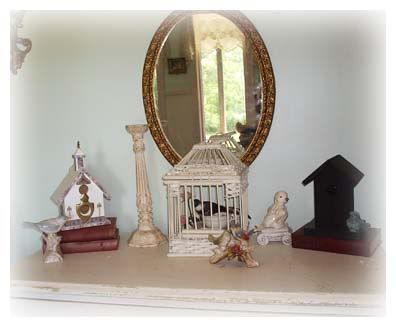
If you're a regular reader, you've seen this chest before. It recently made the move from my livingroom to the office, where it still provides much-needed storage and display space.

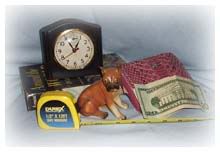
While not, perhaps the things you'd drool over in your favorite magazine, the major furnishings in this room were purchased for well under $100. A little imagination and elbow grease were all that was necessary to turn them into the foundation of a room which is both livable and fun. So in closing, I'd like to encourage you not to put your decorating dreams on hold, even if the budget is. Upgrades can be made later, but in the meantime, making do really isn't so bad...

Until next time,

This post is shared on "Show and Tell Friday"
at Cindy's gorgeous blog, My Romantic Home. You should check it out....lots of great ideas to discover!

Tuesday, August 17, 2010

The Scenic Route

I spent last week working in Bucksport, Maine, and while there, I obviously didn't get any decorating done, but I did manage to take in some breathtaking scenery. It was also a great opportunity to practice my photography, so I thought I'd share some photos.
The impressive Penobscot Narrows Bridge is adjacent to the old Waldo-Hancock Bridge, built in 1931, which served the community for many years.
The new bridge, completed in 2006, is home to the world's tallest bridge observatory tower at 420 feet.
It was almost dizzying climbing around on the bridge looking for angles to photograph, but quite exhilerating as well. I wonder if onlookers thought I was crazy.
I was fortunate to be able to photograph the bridge at different times of day. This picture was taken at the break of dawn.
This was taken at night.
The bridge seems to take on a completely different character by night, and I think this was my favorite time to view it. I will have to admit it was a little scary climbing about in the dark, though!
Within a short walking distance of the bridge lies the Bucksport rock formation.
The white streaks in this mostly metamorphic granite formation are igneous rock created by ancient volcanic activity.
This was the view from where I worked. What an idyllic setting for a mid-day lunch break!
My favorite wildflower, Queen Anne's Lace grows along the edge of the woods. All in all, I found this part of Maine to be quite charming and
picturesque. For those interested, a brief history of the area can be found here.

I hope you've enjoyed my little photo tour. I found the trip to be quite a pleasant diversion, but now it's time to get back on track with my decorating projects.

Until next time,

Friday, August 13, 2010

STYLE FILE:
Ready, Set, Go!

Well, the bunk beds are finally gone, so it's time to get busy and figure out my guestroom/sewing/craft area. A few weeks ago in my posts, Origins of Style Parts I and II, I mused about why we are drawn to certain looks.
For me, deciding on a look or combination of looks is one of my favorite parts of putting a room together, but equally important is following a few basic principles that will

My messy, but soon to be decorated guestroom

guide the design process and insure that the room will live up to its expectations. In this post, I’d thought I’d share some of my essential “pre-decorating” tips.
Before the first decorative decision is made, I think the single most important thing to ask yourself is, “How will the room need to function?” In this case
I need space for a guest, a place to sew, and lots of storage space for linens, out of season clothing, paint, fabric, and various arts and crafts supplies. While I love the open floor plan of my house, I want to restrict my pets' access to this area, so a room division will need to be included in the design. That’s a pretty tall order for a 13 by 14 foot room, which leads me to the next consideration, "constraints".

Accumlated craft supplies completely block access to my sewing machine and must find a permanent home.

Probably the least fun portion of any decorating project is detemining the constraints on it. One of those is space, as I mentioned above, and planning for the funtionality needed in the available square

footage. In my case I live in a rental cottage, so no structural changes can be made. This unfortunately includes the flooring, which is blue commercial tile, so that must be

Space, time, money and pets are things to consider when planning a room.

worked into the color scheme to avoid a major clash. Another constraint to consider is time. For me, I need to have all of my projects wrapped up by mid October so that I’ll be ready to entertain a guest. The final constraint that I must account for is budget, which is unfortunately quite small. Looking on the bright side, however, tight budgetary restrictions often spark creativity in ways that more lenient funds may not. There are lots of great flea market bargains waiting to be found, and fixing them up is certainly one of the most enjoyable aspects of putting it all together!
The next step for me is editing. I like to take an inventory of what is already in the room, and decide what needs to stay and what needs to go. If something is already working well in the space, then

there’s a pretty good chance it will be a “keeper” although it may need to be revamped to fit in with the new plan. If something is definitely not working, it needs to go….either to another room, to your favorite charity, or if you’re just not ready to part with it, to long term storage. For this room, the “keepers” are two armoires. I believe one will work without any changes and the other will have to be

This armoire is used for storing linens and will remain in the room.

restyled to compliment the new decor. The “goners” are the bunk beds and dresser that have been residing in the room. My sewing table and a small wicker table fit into the “maybe” column.
At this point, I like to sketch out a plan which will accodate all the functions of the room. Included in the plan will be all pieces of furniture that will be staying as well as plotting a space for new additions required for the room's functionality.

One of the plans that I created for my guest/sewing room

A room plan can be done by hand or with software. There are several free internet applications which do this. The plans shown here were done using the room planner software at Conlin's site. Of the ones I've tried, I found this to be the most user friendly.

Some alternate plans for the room

If you like, you can even import the image files from the site and tweak them a bit more with graphics software such as Photoshop, as I've done in the pics directly above. Sketching things out first can save a lot of mistakes when it comes to bringing in new pieces. The sketch will show how much space is allocated for each item, and will be an important reference when shopping.
After needed items are identified, I like to shop my house to see if I already have anything that will fit the bill. In this case, the sleeper sofa from the living room
was already ear-marked for a move. I also have a coffee table that may work in this space as an interim piece until the storage ottomans I want can be constructed. A small wicker stand that I already own can sit in for the vintage dress form on my wish list.

My dog, Lucy, who is lounging on the sleeper sofa that will be relocated to the guest room.

While my current sewing table is smaller than than I'd like it will probably remain in place temporarily until time and budget allow for a replacement.

Alternate room plans using interim furnishings

In keeping with the title of my post, I've gotten READY; a plan is SET; and now it's time to GO! It's time to enjoy some digging into blogs, magazines and such for ideas, and searching out the perfect treasures to complete the room. Let the fun begin!

Until next time,

LinkWithin

Related Posts with Thumbnails