GROWN-UP GIRLS LIKE TO PLAY TOO! WELCOME TO MY PLAYGROUND

Showing posts with label art. Show all posts

Thursday, October 21, 2010

Bittersweet

This is a bittersweet entry for me. Bitter because of the damage done to a lovely book, and sweet in that I've relished the memories of it while composing this post. You see, the
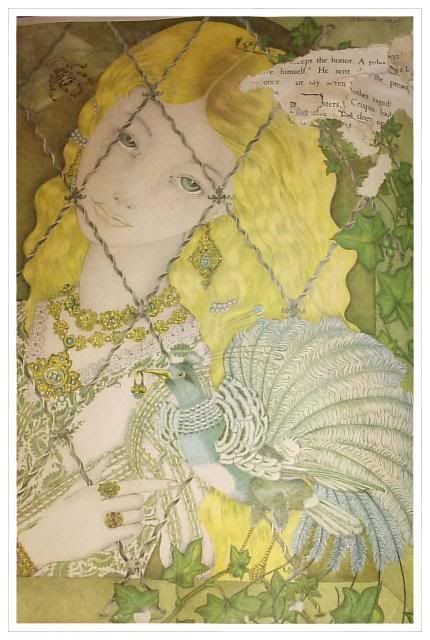
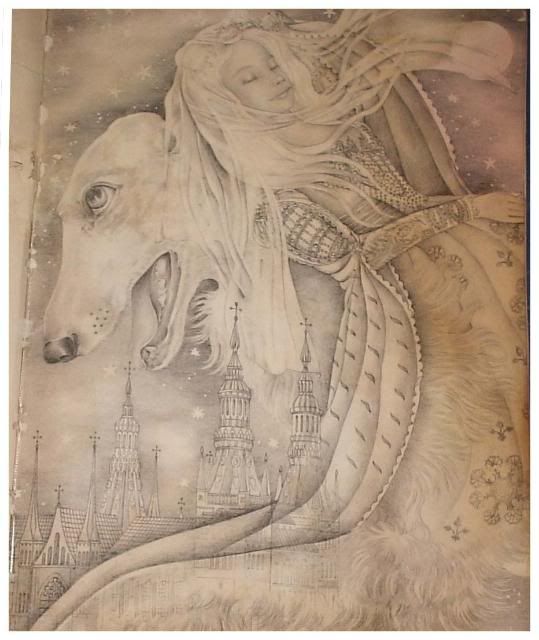
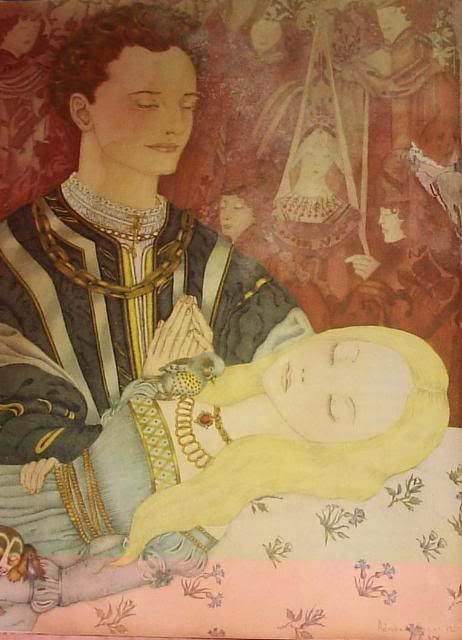
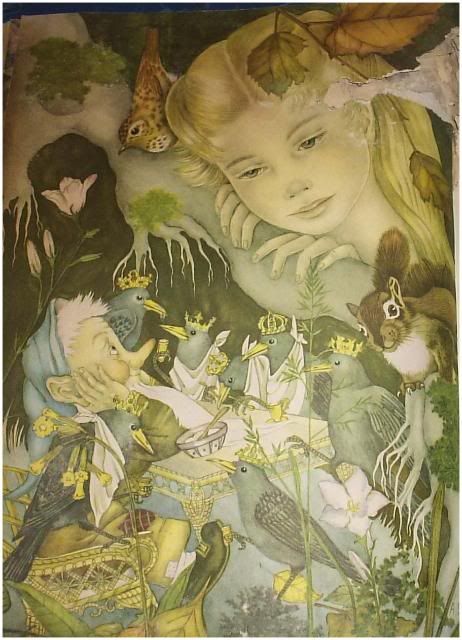
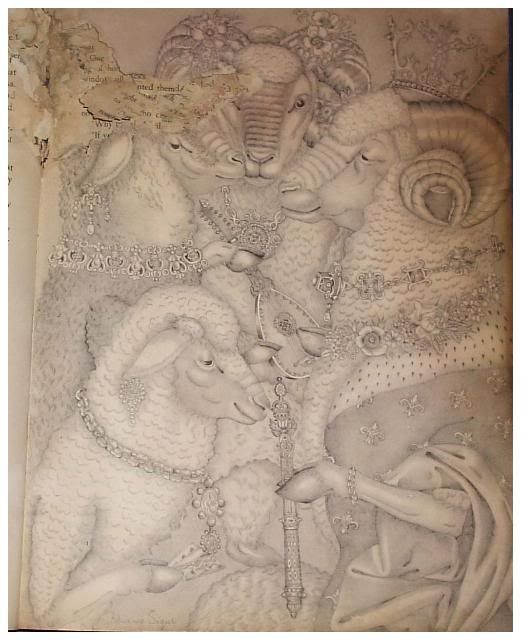
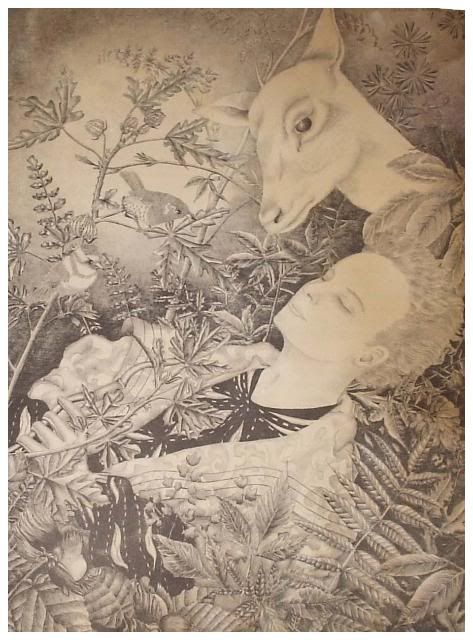
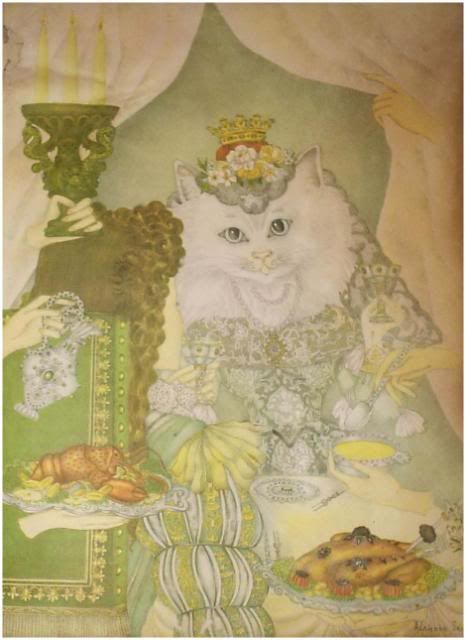
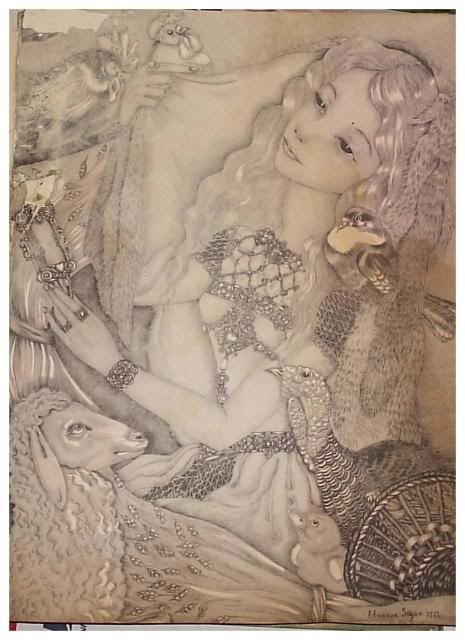
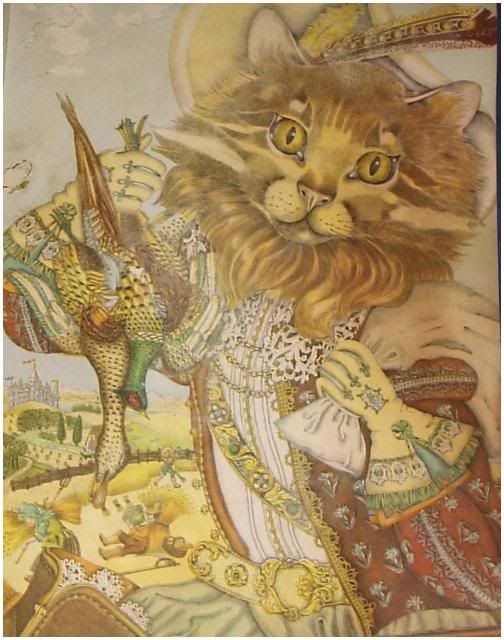
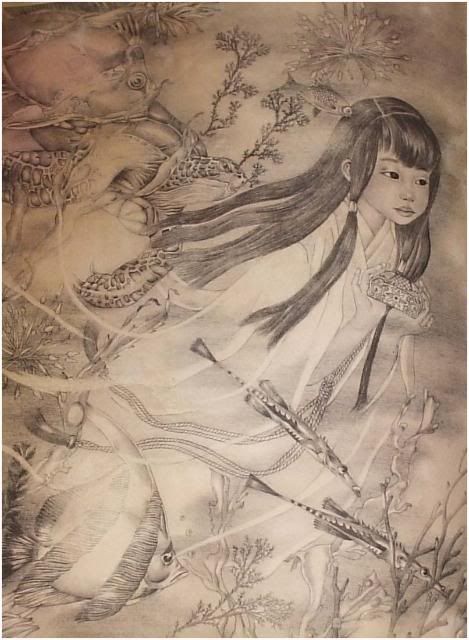
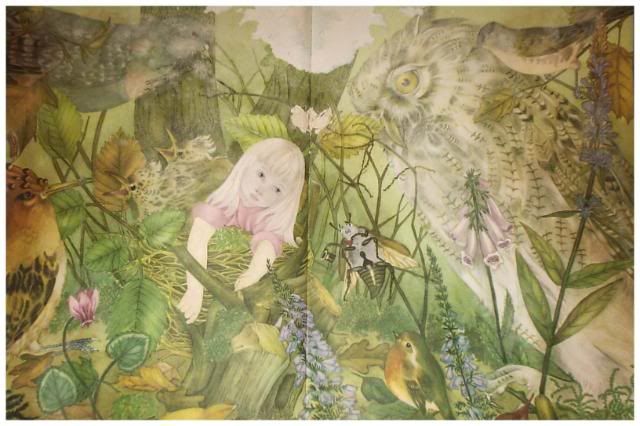
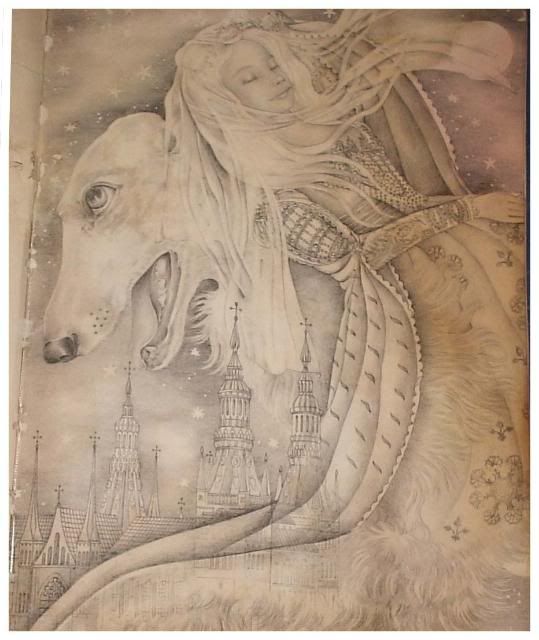
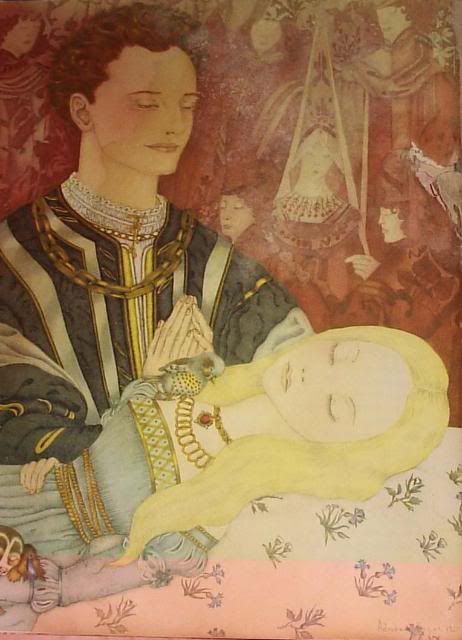
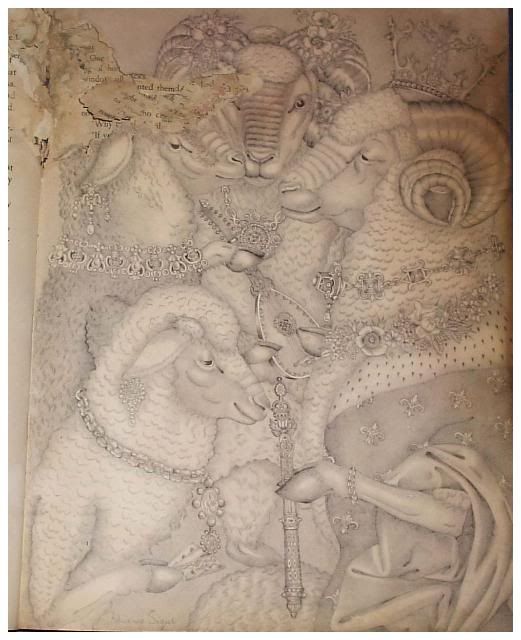
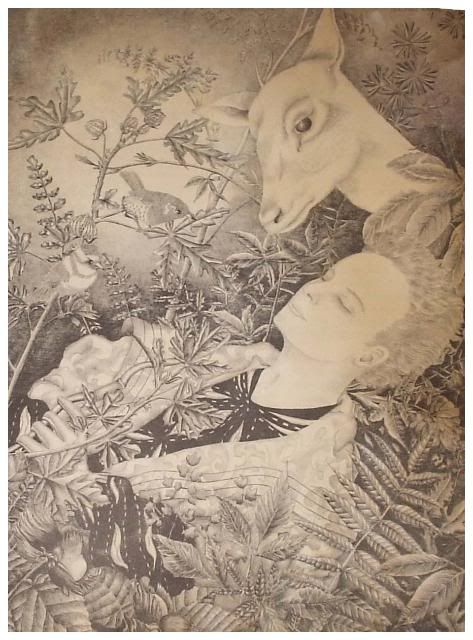
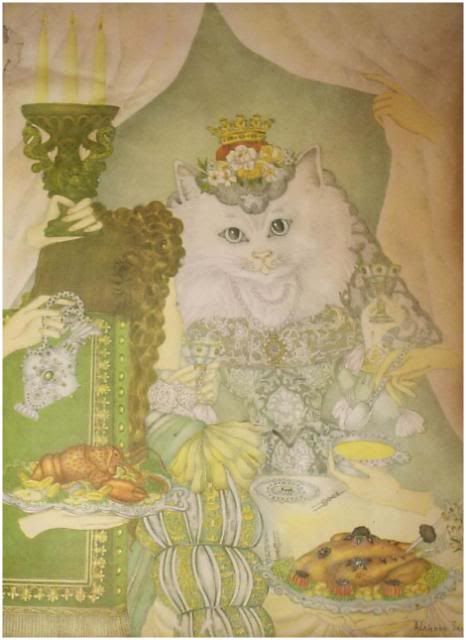
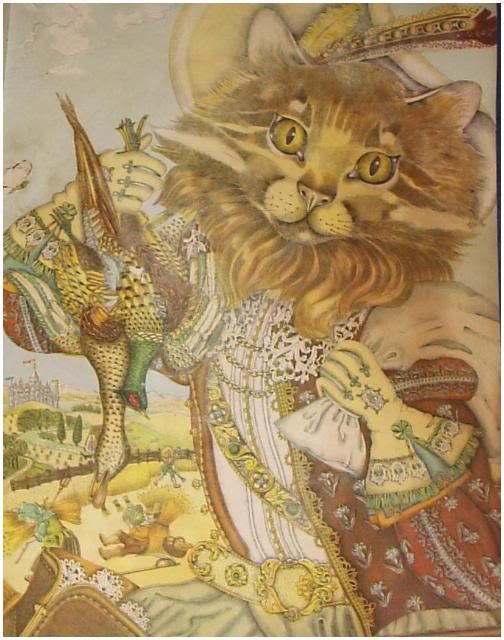
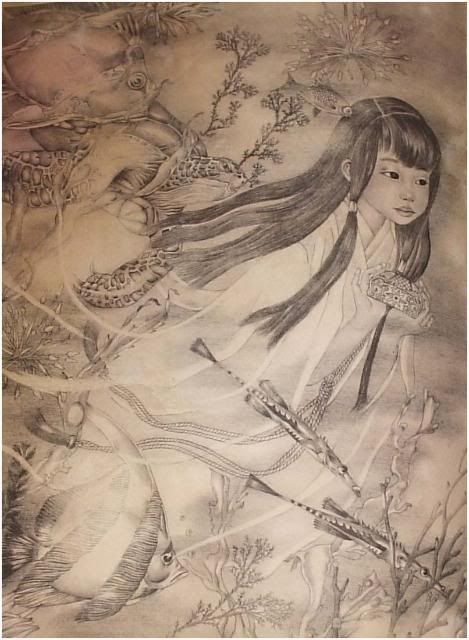
book I'm referring to is a book of French fairy tales* that was given to me in my childhood my my late Aunt Sara. It has perhaps the most beautiful illustrations** I've ever seen, and was my favorite book as a child. Enter Hurricane Hugo in 1989. My home was severely
damaged by the storm, and my cherished book as well. I've clung to it all these years in its sad condition, but have finally

decided to move on. I just finished photographing the illustrations in the book to preserve them as best I can. Now I'm
going to remove some of the less damaged prints and frame them. Others will be "reborn" into new pieces of art, as I incorporate them into my collages.

Now I'd like to share some of them with you.
Click on any image below to enlarge.


Bluecrest


The Tinder Box


The Sleeping Beauty


Beauty and the Beast


The Seven Crow Princes


The Royal Ram


The Wild Swans


The White Deer


Queen Cat


Donkey Skin


Puss In Boots


Urashima and the Turtle


Thumbelina

I hope you've enjoyed browsing some of the pages of my beloved childhood book with me. I've certainly enjoyed sharing them!


Until next time,
Sheilla
*This book was initally published in France in 1958. Rights were purchased by Golden Books and it was subsequently published in the United States. My edition was published in 1966 and was part of the seventh printing.
**The amazingly beautiful illustrations in this book were done by Adrienne Sègur.
I'm linked up with Show and Tell Friday at Cindy's gorgeous blog, Romantic Home Check it out for lots of incredible inspiration!

Tuesday, October 12, 2010

Artist Profile:
Jennifer Molley Wilson

Today it is my privilege to introduce to you a very talented emerging phototgraphic artist, and someone it is my pleasure to call "friend", Jennifer Molley Wilson. Because it's White Wednesday, I'm selecting some of her works in white to share with you. Jennifer has an amazing gift for taking the ordinary to an extraordinary level.
Click on any photo to enlarge.


Her camera is the Apple iPhone 3GS, using the Hipstamatic 175 iPhone Camera App


All elements are photographed just as they are found.


It goes against her artistic message
to rearrange objects
that have already been posed by serendipity.


In keeping with this artistic
message no photographs are edited or retouched.


She is fascinated by the precision born from randomness


The objects that gather in some forgotten corner.


The fading facade of a forlorn past.


These are the images she is compelled to preserve


Jennifer will soon be exibiting her work in a new artist coop/gallery in Bristol, Tennessee, with plans to expand into the Asheville, North Carolina galleries in the near future.
To see more of her work, you can visit her online gallery.
To purchase, you may contact the artist directly at jennifermolleywilson@gmail.com.
Jennifer is very quickly becoming one of my favorite artists!
I hope you've enjoyed this little photo tour as much as I've enjoyed sharing it with you.


Until next time,
Sheilla
I'm linking up with "White Wednesday" at Faded Charm. Come on over and check things out at Kathleen's gorgeous blog!

Thursday, September 9, 2010

PROJECT: Framed Keys

I wish I could take credit for this idea, but it comes by way of my friend, Liz. I love old keys, and went nuts when I spotted a set of framed keys that she'd put together, so I decided to make one for myself.
The project just couldn't be easier! Take a piece of cardboard fitted to the back of a photo frame and cover it with the paper or fabric of your choice.

I used a piece of linen and some lace accents. Then place your covered cardboard in the frame behind the glass.
Place your old keys on top of the glass until you have a pleasing arrangement. When you're happy with the appearance, use a strong, clear glue to adhere the keys to the glass. I like Goop.
Voila! A new piece of art work...cheap, easy and fun!

Until next time,


This post is shared on "Show and Tell Friday"
at Cindy's gorgeous blog, My Romantic Home. You should check it out....lots of great ideas to discover!

Tuesday, August 10, 2010

One Thing Leads to Another...

A short time ago, I purchased a long-coveted sofa from a friend of mine, and realized that with the new addition, a new scheme in the living and dining areas of the house would be necessary.
Fortunately, I had a “look” in mind, based on a vignette that I already had in the house and wanted to expand upon.
I love the crisp romance of the black and white photo and the serenity of the white busts and cherubs that occupy the top of the piano, and knew that I wanted more of this look.

In anticipation of the arrival of the sofa, I began to make a few minor changes, the most important of which was the hutch display. In keeping with my craving for white, I removed my pink flowered dishes and replaced them with the white ones that are trimmed in gold.
Unfortunately, the bright turquoise background of the hutch, which had offset the pink and white dishes so beautifully, clashed miserably with the white and gold ones.
I thought about a color for the background, and decided upon a smokey gray; Something understated, but not white, as I wanted the dishes to stand out. It turned out to be a good choice. Good enough, in fact, to become the basis of my new color scheme.
Since I painted my walls a lovely pale shade of robin's egg blue last year, I've decided to stay with it. In keeping with the new direction, however, I'm planning to change the trim color from pale pink to pale gray. The photo below some of the fabrics and accessories that I've been gathering for use in the room.
As you can see, I've chosen a palatte of robin's egg blue with some grays along with silver and gold. All of this with a very healthy dose of white. I've chosen some formal and informal fabrics as well as modern, traditional, and vintage ones. I think it's going to be a fun mix. Now to figure out the guest/sewing room.... Stay tuned to see how it all comes out!

Until next time,

Saturday, July 31, 2010

Refrigerator Art

I love it when I find something useful, pretty, practical, and inexpensive, and this little find certainly fits the bill. The other day I was at Ocean State Job Lots and found these great
little magnet sets. I believe they were designed for school lockers, but what great refrigerator magnets they make!

You see, I enjoy using my refigerator as a canvas for whatever "art" strikes me at a given time, and currently, I'm into displaying black and white
photographs there. Unfortunately, the typical decorative kitchen magnets just don't cut it with B&W photography! But
these little goodies are just perfect with their graphic shapes and black and silver color, and while they're wonderful on their own, they're even better combined with other types of fasteners. I thought I'd show you some of my favorites today.
In the photo above, I've combined one of the black magnets with a magnet made from a vintage brooch from the flea market. I'm planning to make a couple more of these as soon as I come across the right junk jewelry to work with, but I think that will be enough, as they could really make the display busy in a hurry! But a little bling goes a long way and a few of them certainly a bit of punch to the arrangement.
For these photos, I'm using magnetic photo holders that I found at a camera shop several years back. They've also been one of my "best little bargains", as I've used them to display numerous photos through the years. The holders are sized for a standard 4 X 6 print, however my vintage black and white pictures are a bit smaller. To compensate, I simply backed the snapshots with a piece of black paper, and for a little something extra, I cut a phrase out of a magazine to use as a caption for one of them.
For this photo, I repurposed a magnetic mini-chip clip in a metallic silver tone.
For this one, I used a magnetic binder clip from the office supply.
It's fun to let your imagination run loose when it comes to magnets and fasteners for this type of display. For the only color image in the grouping, I used magnetic childrens' letters to attach a
magazine page with a great photo of some delectable looking cookies. Other good fasteners could be fashioned from clothes pins, checker board pieces, or Scrabble tiles. I'm sure once you think about it and browse your home with a discerning eye, you'll see lots of potential fasteners that will look 100% better than the designated refrigerator magnets you can buy in a store, so have some fun with it and create a display that is uniquely you!

Until next time,

Wednesday, July 14, 2010

My Art Prints Have Arrived!

Recently I decided to have some of my art work printed, but finding a printer turned out to be quite a challenge. After searching the Belfast area in vain for a print shop that could handle large, quality prints. I began searching online.
"First Rose" - Pencil Sketch
My first several stops were quite discouraging. Most of the printers I found had extremely high prices for small quantities. But then I happened across Northeast Reprographics in Bangor. Their prices were quite reasonable, and to make things even better, Jeff was very helpful (and extremely patient) in guiding me through the process of preparing my artwork for printing.
"Stairway to Heaven" - Multimedia Collage

"Suite Madame Blue" - Multimedia Collage
I had 4 diffent types of media to print, pencil sketches, photographs, and collage, and I was quite happy with the results of each.
"Friends" - Black and White Photograph
The "Friends" shot is my sweet dobie-lab mix Lucy, with Prissy, my cat. It was an accidental shot, but one of my favorites. I'll be using the black and white images in the photo wall I'm putting together, and the collages will go in my guest room/project room that I'll soon be re-doing. I've just got to get the old bunk beds out of there so that I can start. Yesterday I visited a lumber yard and priced wood for a bookcase-room divider that I'm planning to build. It will be my first large woodworking project, so it will be interesting to see how that goes. The folks at Buxton Building Supply were extremely helpful in suggesting materials and, like Jeff at Reprographics, most patient in guiding a newbie! Time to get busy!

Until next time,

LinkWithin

Related Posts with Thumbnails